I met a priest who baptised Zoya and he said we should say baptism and not christening if we were Catholics.
So, it is Annabelle's baptismal cake.
This is a 10 inch [25 cm] round cake, which is 3 inch [7.6 cm] tall, and weighs 5.7 pounds [2.6 kg] [not including the cake boards]
retails at £40 and will slice 30 portions.
The customer ordered a moist lemon cake. You can have an orange cake or a chocolate marble cake instead of a lemon cake.
The cake has no filling. People put fillings in their cakes, which is normally made up of fat and sugar in equal proportions, to give people an impression the cake is not dry. I find this very unhealthy and the extra sugar and fat is very bad for everybody. So none of this type of filling from me!
The cake is made from 100 percent salt free English butter, cane sugar, free range eggs and the best of British cake flour. So the cake is very light and moist.
Thursday, 5 March 2015
Thursday, 26 February 2015
Jiaozi 餃子
Jiaozi 餃子 is a Northern Chinese dumpling which is cooked in boiling water similar to ravioli. This dumpling is normally eaten on Chinese New Year first day because the jiaozi looks like gold / silver ingots in old China.
However, I just love eating jiaozi and I will share my way of making jiaozi with you today.
Filling
500 grams of minced pork [or any other meat which you prefer]
220 grams of shredded Napa cabbage, known as Chinese leaves in the UK
40 grams of chopped spring onions - I use organic spring onions
10 grams of finely diced ginger - you can increase it to up to 13 grams if you like ginger
1 tsp of salt - I use Himalayan salt
2 tbsp of Shaoxing wine 紹興酒
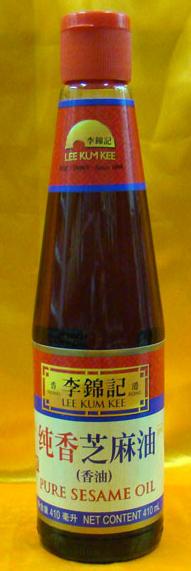
2 tbsp of sesame oil
2 tbsp light soya sauce - I use Amoy light reduced salt soya sauce
2 tbsp oil - I use shallot flavoured oil - I fried sliced shallots in oil and keep the left over oil for this purpose
You can add finely ground white pepper if you want but I do not because I have acid reflux. I also do not add garlic because of my acid reflux.
Mix all the above ingredients together and you get something like this. First add the teaspoon of salt on the shredded Napa cabbage. Use your hand to ensure the salt is evenly scattered amongst the Napa cabbage. Then allow this to stand for awhile, allowing the cabbage to sweat and then add the rest of the ingredients. Then use your hand to mix the ingredients together to give a mixture like what is shown in the picture below.
Wrap the bowl with cling film and store in the fridge for at least half an hour.
Making the dough
200 grams flour
100 ml of water - not cold water from the tap - I use tepid water
No salt, no eggs, no oil - just flour and water
Make this into a dough, and then wrap the dough with cling film and allow the dough to stand for an hour or so.
Divide the dough into 20 pieces - 200 grams of flour - 20 pieces.
Flatten the dough into discs and roll them out to be thinner in the outside and thicker in the middle of the disc.
Wrap the dumplings as you like. It has taken me years to master this art, but really wrap them into half moon shape and when you are more confident try other shapes.
Cook the jiaozi in boiling water until cooked, but make sure the wrapper is al dente. To do this, place all the 20 jiaozi into the boiling water and when the water comes to the boil, add about 50 ml of cold water and do this three times. After the third addition of cold water, allow the water to come to the boil again. Switch off the heat, and scoop the cooked jiaozi out of the hot water, and place them on large plates. Serve immediately and you can eat this jiaozi with anything including chilli oil, or freshly sliced chillies or eat them plain like the way I like it. Chinese people eat jiaozi with Chinese black vinegar and julienne of ginger.
Wednesday, 11 February 2015
Happy Birthday Clairy
Clairy from number 28 was 77 last Sunday. Dr Marie took Clairy and myself for a celebratory dinner at Montys Northfields and while at dinner, I asked Claire if she had a birthday cake. She said she would make cakes for others but not for herself. So I said I would make her a small cake and we are eating it together tomorrow.
Friday, 6 February 2015
Fish Croquettes
Dr Marie took me, little Sonya and our neighbour's two boys to Papaya at Northfield for a Sri Lankan meal when she came home from Sri Lanka in Januray this year. She ordered Sri Lankan fish cutlets for us as starters and they were delightful and delicious. I have eaten various fish cutlets which Dr Marie had ordered from various suppliers but they were always not quite right and the fish cutlets from Papaya were the best. I told Auntie Marie I would make fish cutlets one day.
And today, I am making my own fish cutlets, with the help of Dr Marie's advice and as these are not Sri Lankan fish cutlets, I am going to call these snacks as "Fish Croquettes" and not fish cutlets.
Ingredients:
2 tins of tuna in brine - drained weight 220 grams
cooked potato - net weight 220 grams
ginger 10 grams, garlic 10 grams - I peeled these, sliced them, and then used a granite pestle and mortar to pound them into a fine pulp - you really do not want a lump of ginger or garlic in your mouth when you are eating these fish croquettes
coriander leaves with stems - 25 grams - I washed and dried them before slicing them finely
1/2 a green chilli - de-seeded, and diced finely
1/2 tsp salt
1/4 tsp ground turmeric
1/2 tsp ground cumin
1/2 tsp ground coriander
1 large yolk of a free range egg
Note: Sri Lankans would not use coriander but curry leaves. In addition, I have not seen the use of turmeric, cumin and coriander in their fish cutlets. Auntie Marie was from India and she would use these three spices for her Indian cutlets. When Auntie Marie made Indian cutlets, she would add an egg yolk to the mixture and I would follow Dr Marie's way of making these types of snacks.
You want to use your right hand to mix the above together, and making sure there are no lumps and all the ingredients are mixed together homogeneously.
Then shape the mixture into 9 equal size croquettes. You then want to coat each croquette with flour [plain white flour is good] and then beat up an egg and coat the floured croquettes with the beaten egg with your right hand, and roll the croquette with Japanese bread crumbs with your left hand. You can see in the picture, I have flour on one dish, beaten egg on another, and bread crumbs on a third bowl.
It is important you have the croquettes the same size as when you fry them, they all take the same amount of time to cook. I physically weighed every croquette and the weight ranged from 54 - 55 grams each.
I then freeze these croquettes, which may take about 6 hours before deep frying them from frozen. Croquettes fry better when deep fried from frozen.
I used about 750 ml of vegetable oil and fried the croquettes at around 180 C. I deep fried the croquettes in batches and after the last batch, I threw the oil away.
My fish croquettes!
The funny colour of the picture is because it is late at about 6 pm and there is no natural light!
![]() |
| Fish croquettes |
The two missing fish croquettes are waiting for little sweetie Sonya to eat when she comes home next weekend. Auntie Marie is going to freeze the croquettes for little Sonya.
Tuesday, 3 February 2015
Apple Meringue Pie
I was at Claire's [number 28] for lunch on Sunday and she made an apple meringue pie for dessert. She had slices of apples at the bottom of a large glass bowl with meringue on the top and she baked this at 135 C fan oven for an hour and then turned off the fan and baked for another hour and allowed the apple meringue pie to cool. She added no sugar to the apples and the sweetness of the meringue was dissipated into the apples and the whole dessert tasted just wonderful.
Dr Marie has lots of egg whites in her freezer, leftovers from the Ceylon Christmas cakes which she has made over the years. In the last few occasions, when we had made Pavlova, people did not eat the dessert because it was too sweet and full of cream. I think Claire's apple meringue pie would be a good way to use up the egg whites in Auntie Marie's freezer.
Coincidentally, I have an agape [a shared meal] tonight with my community, and I will make this apple meringue pie.
Ingredients
Dr Marie has lots of egg whites in her freezer, leftovers from the Ceylon Christmas cakes which she has made over the years. In the last few occasions, when we had made Pavlova, people did not eat the dessert because it was too sweet and full of cream. I think Claire's apple meringue pie would be a good way to use up the egg whites in Auntie Marie's freezer.
Coincidentally, I have an agape [a shared meal] tonight with my community, and I will make this apple meringue pie.
| Apple Meringue Pie |
- 4 large cooking apples - I used Bramley apples - around 750 grams - peeled, cored and sliced
- 200 ml egg whites - I used Auntie Marie's 2012 frozen egg whites from six large eggs.
- ¼ tsp cream of tartar and if you are unable to buy cream of tartar then use 1 tsp of salt instead
- 9 ozs or 260 grams [> 1¼ cups] caster sugar also known as superfine sugar in the States
- 1 tsp cornflour, also known as cornstarch
- 1 tsp white vinegar
- Lay the sliced apples on the bottom of a tall oven proof glass dish about 10 by 8.5 inches.
- Whisk the egg whites with the cream of tartar or salt until foamy and then add the sugar one tablespoon at a time.
- When all the sugar has been added and the meringue is stiff, then add the cornflour and vinegar and continue to whisk until all the ingredients are incorporated.
- Pipe the meringue on top of the sliced apples and bake in a preheated 135 C fan oven.
- After 18 minutes, turn off the fan and continue baking for about 2 hours at 130 C or until you can see the apples are cooked through the glass container.
| I can see the slices of apple are cooked through the glass container |
Evaluation: I served this dessert to some 20 brothers and sisters of my community with unsweetened whipped double cream [300 ml]. They all loved it. The dessert was not too sweet and has a very light texture. A total success, thanks be to God and to Claire from number 28 TTC.
There is no need for any further alteration to this excellent recipe.
Sunday, 1 February 2015
Mango Mousse
Dr Marie gave me a mango mousse recipe which uses 1 cup of water, 1 sachet of gelatine [just under 12 grams], a tin of mango pulp which is 850 grams or 30 ounces in weight and a carton of double cream, which is 300 ml in volume.
However, my friend Christina and I felt that the mousse was too soft and we wanted a more "Chinese like" mousse which is more set. So we experimented and came out with this recipe.
¾ cup water which is 6 fl oz or about 180 ml
16 grams of gelatine granules
Pour the gelatine granules onto the water and when the granules expand, heat up the water and gelatine until the gelatine dissolves.
250 ml double cream [do not use more than 280 ml]
850 grams or 30 oz of mango pulp - which can be bought in a tin and is already sweetened - Waitose and Tesco sell mango pulp in tins.
- Beat the double cream with a handheld cake mixer until it thickens. Pour
⅓ of the mango pulp into the whipped double cream and continue to whisk. - Add the dissolved gelatine liquid into the rest of the mango pulp and mix will with a spoon.
- Pour the rest of the mango pulp which has the gelatine into the double cream and continue to mix to get a homogeneous liquid.
- Pour the mixture into a large bowl or into ramekins [around 12 150 ml large ramekins.
- Clingfilm the mousse and chill overnight before serving.
Friday, 30 January 2015
Charlemagne's Name Day part 2
I made a cake for Charlemagne's name day and we would be cutting the cake after Holy Mass this evening. We have our annual house Mass and after the Mass we have a shared meal. So here are the pictures of the cake.
Halina B said the sides look like a Wedgwood design.
I painted the flowers sunburst gold for the little emperor and the leaves were painted in two tone green.
John B said he liked the asymmetrical way in which the flowers were arranged. He thought it was very artistic.
There are doves on the cake because little Charlemagne loves birds. Green Indian Parakeets often visit him and get him very excited.
Tuesday, 27 January 2015
Blessed Charlemagne's Feast Day
Blessed Charlemagne's feast day is on Thursday 28th January and it is my little boy's name day also. Little Charlemagne's birthday falls on Good Friday this year and who would celebrate birthdays on Good Friday? So he has to have his birthday transferred to his name day and he will be 12 years old on the third day of April 2015.

[These pictures of little Charlemagne were taken a couple of days ago with Auntie Marie's new mini iPad.]
So I am making cupcakes for him: humans can eat cupcakes made from butter, eggs, sugar, flour et cetera top with Italian meringue butter cream and the cat can eat a cupcake made from tuna, and Auntie Marie has bought two large tins of tuna in spring water for my little boy.
Here are examples of human cupcakes for little Charlemagne's name day.
And for my Ahmue - this butter cream tastes like mum's. Here is the recipe.
200 ml of egg whites
1/8 tsp of cream of tartar
50 grams of caster sugar
whisk until light and fluffy - soft peak stage
In a small pan, which has a sprout, add 250 grams of sugar [can be caster or granulated and can be reduced to 200 grams if you do not want the butter cream to be too sweet] and add 100 ml of water. Heat up the sugar and water in low heat until the sugar dissolves and then turn up the heat to medium. You will have to stir the sugar and water to help the sugar dissolve. If you find any sugar crystals on the side of the pan, then use a silicon spatula to push the crystals down to the liquid.
When all the sugar has dissolved, turn up the heat to medium and do NOT stir anymore. Insert a sugar thermometer into the syrup and let it boil until the temperature reaches 121 C. When the syrup reaches 121 C, turn off the heat, place the bottom of the pan in a bowl of cold water to stop the temperature of the syrup rising and then dry the bottom of the pan with a clean towel.
Turn your beater, which has a balloon whisk, to the highest speed and pour the very hot 121 C syrup into the whisked egg whites. Continue whisking even when you have finished pouring the syrup into the egg whites.
When the whisked egg whites have cooled down, i.e. the bowl is only warm to touch, add 450 grams of unsalted butter, which has been cut into cubes into the egg whites while it is whisking at high speed. Continue to add the cubes of butter, a cube at a time, until all the butter has been added. Then add your flavours. I added some vanilla extract [1 tsp] and orange oil [1/2 tsp] into the butter cream. You can add any flavours which take your fancy.
Continue whisking until the butter cream is well formed and I then wrap the top of the bowl with cling film until you are ready to use the butter cream.
If you store the butter cream in your fridge over night, then you have to warm up the butter cream to room temperature and the whisk the butter cream until it reaches a soft state which allows you to pipe or apply it on your cakes.
This butter cream is truly delicious and it reminds me of mum's butter cream. However, Auntie Marie says perhaps I could reduce the amount of sugar in the butter cream. If I were to make this butter cream again, I would reduce the sugar by 50 grams.
AND Mrs Caroline Jones says she loves the butter cream because it is so light and creamy - and personally I [I as in Ruyi] think it tastes better than whipped double cream.
28 January 2015 morning
Today is Charlemagne's feast day or name day or whatever you want to call it. I got up at 5 this morning to bake little Charlemagne more cup cakes and decorated them after Mass. I did not take him to Mass as he would create mayhem in church. LOL However, I will bring him to Fr Abbot Francis on Friday after the house Mass for the monk to bless him like last year.
Here are the photos of the cupcakes I baked and decorated today.
Thursday, 22 January 2015
Kao Chashaobao 烤叉燒包 Baked Chashao Buns [Chasiu bao in Cantonese]
Dr Marie's grand niece, Megan E from the States, sent me a recipe for cha'shaobao and I made it for breakfast this morning.
Ingredients for the wrapper: [By the way, there is no reason not to use my sweet New Year bread recipe for this wrapper.]
5 cups American Rose wheat flour [22 oz or 622 grams] + 1/3 cup [52 grams] of this flour for tangzhong roux 湯種 + 60 grams [a little > 1/3 cup] for dusting
2/3 cup water + 1/3 cup whole milk for tangzhong roux 湯種
1/3 cup granulated sugar [62 grams]
1 tsp salt [6 grams] - I used Hilmalayan salt
1/2 oz [15 grams] baking powder [single action baking powder]
50 grams fresh yeast
2 large eggs
2 oz unsalted butter [4 tbsp or 56 grams]
Egg Wash - 1 egg + a good pinch of sugar + 1 tbsp milk - slightly beaten together
First make the tangzhong roux - Mix 52 grams [1/3 cup] American Rose wheat flour with 2/3 cup water and 1/3 cup whole milk and cook slowly until the mixture becomes a thick paste.
Add in the 1 cup of whole milk and sugar into the tangzhong and yeast to allow the yeast to be activated.
Meanwhile sift the flour, mix in the salt, rub in the butter, mix in the eggs and knead in the activated yeast mixture.
If you have a table top mixer like a Kenwood Chef, use a dough hook and knead the dough for about 20 minutes.
Cover the dough and allow the dough to rise to at least double or triple its original volume which could take about one or two hours, depending on the ambient temperature.
Filling for the bun:
2 tbsp vegetable oil
1/2 cup of finely diced Echalion shallot
3 tbsp flour [I used strong bread flour]
3/4 cup chicken stock
Seasoning: 2 tbsp granulated sugar, 2.5 tbsp light soya sauce, a little less than 2 tbsp oyster sauce - mix these together and set aside
2 cups [260 grams] finely diced chashao 叉燒 - Cantonese bbq roast pork
1.5 tbsp sesame oil
Sauté the finely diced shallot in the oil until slightly brown and then add the flour and mix well. Add the chicken stock slowly to form a roux and then stir in the seasoning. When this is piping hot, add in the diced chashao [bbq roast pork] and when the meat has been heated through, turn off the heat and mix in the sesame oil.
When the dough has risen sufficiently, divide the dough into 16 portions and shape each portion into a circle where the centre is thicker than the edges. Fill each circle with a portion of the filling, and close the package and ensure the edges are tightly sealed. Place the prepared buns on parchment squares, with the sealed edges facing the paper and allow the bun to rise again on a baking tray.
Heat your oven to 180 C - I use baking mode on my oven which is fan heating with heat coming from the fan and the bottom of the oven so I can bake three trays of the buns at the same time.
When the buns have risen sufficiently, egg wash the buns at least twice, before baking in a pre-heated oven for some 20 - 25 minutes until the buns are cooked. You know the buns are cooked when you knock the bottom of the buns and it sounds hollow.
Notes: As this flour is very expensive, I buy the flour when I go to WingYip [榮業行 or RongYe in Mandarin]. Sometimes there is a breakage of a huge 22 kg bag and WingYip would repackage the flour in 1.5 kg bags and this becomes more affordable. Alternatively, you can experiment with "bun flour" which you can purchase from some Chinese supermarkets but I have not experimented with any bun flour because I am very happy with the American Rose flour 美國玫瑰粉 which is sourced from China.
Evaluation: Megan E said the buns were not dried, not salty and very good indeed.
I have not been very successful with the filling of Chashao bao because I found my previous recipes were too salty. However, I rather like this recipe as the filling is not too salty. So thank you Megan E for sending me this recipe and I can make chashao bao again in the future - perhaps the steamed version next time.
Caroline, Auntie Marie's hair-dresser, said, "The buns were lovely, light and moist and savoury filling was just delightful. The buns melted in my mouth. I intended to eat only one bun and ended eating two buns in ten minutes and will be full for five hours."
Auntie Marie said, "The buns were delicious and the filling was gorgeous."
If you want a heavy bread texture, then use strong bread flour instead of the American rose wheat flour. However, Chinese people prefer the lighter, fluffy bread which the American rose wheat flour gives.
Saturday, 17 January 2015
Owen's Birthday Cake
Owen celebrated his sixteenth birthday on 13th January, Tuesday. However, due to school work and other matters, he and his friends will be celebrating his birthday tonight with a good meal and a sleep over. I have been given the honour to bake and decorate this cake for this lad.
A little about Owen - Owen is a very talented musician. By Year 8 [around 12 years old] Owen has already passed his piano level 8 with distinction. And since then, he has passed so many music examinations with distinction that I have lost count. He spends his Saturdays at the Royal School of Music learning to be a professional musician.
Here are the pictures of Owen's birthday cake.
Owen has a birthday cake every year and I thought it would be good to mark this cake with 2015 so we know which year this cake is made.
The cake has "May God bless you always." written on the back.
I received an email of Owen's mother last evening asking me to include "16" on the cake. Sweet 16 - I wish I were 16 again! A joke! No I do not!
A little about Owen - Owen is a very talented musician. By Year 8 [around 12 years old] Owen has already passed his piano level 8 with distinction. And since then, he has passed so many music examinations with distinction that I have lost count. He spends his Saturdays at the Royal School of Music learning to be a professional musician.
Happy 16th Birthday Owen!
Here are the pictures of Owen's birthday cake.
Owen has a birthday cake every year and I thought it would be good to mark this cake with 2015 so we know which year this cake is made.
The cake has "May God bless you always." written on the back.
I received an email of Owen's mother last evening asking me to include "16" on the cake. Sweet 16 - I wish I were 16 again! A joke! No I do not!
Friday, 16 January 2015
Zoya's Baptismal Cake
So who is Zoya? Zoya is Dr Marie's great grand niece. She is Dr Marie's sister's daughter's son's daughter.
Both Zoya's mother and father waited for her birth and we stormed heaven with prayers and God looked on Persis and Jonathan with pity and love and gave them this miracle baby.
AND Zoya will be baptised on Sunday 18 January 2015 and I have been given the honour to make the cake for the baptism.
Why is the cake all white? The cake is all white because it symbolises Zoya's dignity as a child of God after her baptism. After baptism, Zoya becomes a child of God and is sinless and pure and white signifies these aspects of the dignity of a child of God.
Why are there doves on the cake? Doves symbolise the Holy Spirit. When Zoya is baptised, the Spirit of God dwells in her and she becomes the holy temple of the Lord.
The cake is baked with 20 large free range eggs and I baked two 10 eggs square cakes and sandwiched them together with ganache. It is a 10 inch square cake and is 5 inches high, excluding the flowers on the top.
There is ganache in between the icing and the cake. It is a very large cake and I will be able to slice 50 slices from this cake and some people might eat several slices each. Well, at least some of my brothers and their sons in my community can eat several slices of this cake each, as they love my chocolate marble cake.
Post Baptism party evaluation: I definitely sliced more than 50 pieces of cake. I had lost count of the number of pieces of cake I sliced. It was like feeding the 5000, I kept slicing and there was more cake to be sliced. Many websites have indicated a 10 by 10 inch square cake could only slice into 50 pieces and there were many more slices into 50 from this cake!
You can for example view this website and you will see a 10 inch square cake can slice 50 pieces.
I used Dr Oetker Ready to Roll Icing and I thought this was not a suitable fondant icing for such a large, tall cake.
In future, I need to use a professional grade fondant icing like Satin Ice when decorating such a tall cake and this will make such cake more expensive to make and decorate. A 2.5 kg of Satin Ice costs around £15 and one will need just over 2 kg to cover such a cake. I can use the cheaper Dr Oetker fondant icing to cover the cake drum.
I used a chocolate icing between the white fondant icing and the chocolate marble cake, and this chocolate icing was very delicious and so easy to use. The only thing was that it was rather expensive and cost of the chocolate was £8 and the cream was £1.80 bringing it to nearly £10 just for the chocolate icing.
I think it is worth paying for the chocolate icing. The chocolate icing is much better than butter cream or marzipan as the barrier between the fondant icing and the cake.
What do I like about this cake?
I like the fact that everything you see on the cake, except the ribbon, cake board / cake drum, can be eaten. There are no cocktail sticks, pins, metal wires, polystyrene buds etc. on the cake or flowers. I have seen people eating the flowers in the party, including adults.
There are some cake makers who use store bought polystyrene buds to make roses. If a child or an adult were to eat such a flower, even X-Ray will not be able to see the polystyrene. Imagine a child eating a flower which has wires in it, what could have happened? I think we should think of safety first and avoid using such materials to make flowers on cakes for human consumption.
I like the cake sitting on a board which is four inches larger. This means each side has a two inch space and I could decorate the sides with anything which is protruding and the decorations will not be affected during the transportation of the cake to the party venue.
I particularly like the chocolate icing in between the cake and the fondant icing. It tasted very delicious indeed. Its only downside is the cost of such icing.
The trend nowadays is to cover the drum with icing and ribbon. The cake sits on a board which is then placed on this drum. I really like this trend as it makes it very easy for me as a cake decorator to cover the cake with icing and then place the iced cake on the decorated drum.
I like the silver plinth on which the decorated cake sits. It really gives the cake an elegant finish.
I also like the fact that this cake does not need to be refrigerated. Who has such huge space in their fridge to accommodate such a cake? One cannot even put any food in the fridge as the smell from the food will diffuse into the cake.
The cake is my famous chocolate marble cake. It is light, soft and moist and full of flavour. Many people in the party complemented me about this delicious cake. Dr Marie has asked me if I could make the cake more firm and I said no because I have worked years to improve my mum's cake recipe to have a cake which is light, soft and moist. I think this is the lightest butter cake I have tasted.
The texture of the cake is worth describing. It is not rough textured but has a very fine smooth texture. It has taken me a long time to understand how to produce consistently marbled chocolate cake which has a fine smooth texture.
I cut the cake with a new huge pastry knife. It cuts through ribbon, cake and everything. This knife has really made my life easier. Well done Lakeland for producing such a knife at such a reasonable cost. So it looks like my other cake knives are redundant after acquiring this pastry knife from Lakeland.
I also have a cutting board, which is used exclusively for cutting cakes. Why? This is because the smell from food can migrate to the cake from the cutting board. In addition, imagine someone using such a cutting board which has been used to cut meat? I would rather not imagine such a thing. I have to remember food safety first!
Thursday, 15 January 2015
Icing Flowers
Monday, 5 January 2015
如意的餡餅 Ruyi's Xian'bing
Xian'bing 餡餅 is a Northern Chinese snack which is eaten like the way sandwiches are eaten with one's hands. They are normally round, like an aloo paratha and the wrapper is gathered and then tugged into the xian'bing and therefore in a small part of a xing'bing, there is a little excess dough, which I do not like.
So, I redesign my own xian'bing and thus I name it as Ruyi's Xian'bing 如意的餡餅 which solves this problem.
I make a half moon shape xian'bing and gather the sides together like a kali'su 咖哩酥.
First the wrapper recipe:
300 grams strong flour
1.5 tsp salt - I use Hilmalayan salt
1.5 tsp sugar - optional - I add this to aid browning of the wrapper
60 grams vegetable oil
180 grams boiling water
Mix the above together and knead it into a dough without burning your fingers / hand with the hot boiling water. Allow the dough to rest for at least an hour. I normally leave the dough to rest for a few hours before use.
This will make 10 [ten] xian'bing.
Filling: The ingredients below can make more than 30 xian'bing.
450 grams of Aberdeen Angus mince beef - I bought this from Waitrose and in my humble opinion, this slow growing, grass eating cattle gives one of the best tasting beef in the UK and the other very good beef is Hereford beef
5 leaves of napa cabbage, more commonly known as Chinese leaves in English supermarkets - finely sliced - add one teaspoon salt to the sliced cabbage and mix well and allow to stand. This will draw water from the cabbage. The Chinese would dispose of the water, but I do not,
1 inch ginger - peeled, finely julienned, and then finely diced
organic spring onions - one bunch - finely slice only the green part - you can use the white part for other things. Some people like using the white part and if you do, then use only half a bunch.
100 grams coriander leaves - finely sliced
and the following seasoning:-
2 tbsp extra virgin olive oil - you can use vegetable oil instead
2 tbsp sesame oil - I use a Singaporean sesame oil made by ZhiCheng 志成 [CheeSeng in Singapore PinYin]
2 tbsp Jinlan 金蘭 Golden Orchid soya sauce - I like this Taiwanese soya sauce because it is not salty and it has a wonderful taste - if you use other soya sauce then you need to use less soya sauce or the xian'bing will be too salty
2 tbsp Shaoxing rice wine 紹興酒
Mix all the above ingredients together to form the filling and allow it to rest and marinate for at least half an hour.
Roll out the wrapper dough into a long sausage and cut it into 10 equal parts and make a disc out of each part.
Fill each of these wrapper discs with a tablespoon of the filling or more if you want and wrap into little xian'bing. You can also make this like a stuffed paratha like an aloo paratha.
Shallow fry the xian'bing in oil, like you would do with an aloo paratha and brown on both sides.
Enjoy!
Garibaldi biscuits
Garibaldi biscuit is an English biscuit which has its origins in Stoke-on-Trent some 150 years ago.
My cousin Margaret loves Garibaldi biscuits and would buy these in bucketloads whenever she visits London.
I have made some Garibaldi biscuits and I wonder what she would think of them when she arrives from Germany tomorrow. Dr Marie says it tastes better than the ones we buy from the shops - much softer in texture. LOL
Ingredients
4 ozs [113 grams] McDougalls 00 plain flour
1 tsp baking powder
1 oz [28 grams] caster sugar or superfine sugar
1 oz [28 grams] room temperature unsalted butter
a pinch of salt
3 oz or more of finely chopped dried fruits of your choice - eg. sultanas or raisins or currants
a few spoons of milk
- Mix the baking powder into the flour and rub the butter into the flour
- Mix in the sugar and salt
- Add about 4 - 5 dessert spoons of milk [or more] until a dough is formed.
- Allow the dough to stand - I cling film the dough and let it stand for about an hour after I have kneaded it into a ball.
- Roll out the dough into a rectangular shape [8 by 12 inches] and scatter the dried fruits on only half of the dough. Fold the rolled and filled dough in half - which now measures 8 by 6 inch - and then roll out the dough again to 8 by 12 inch.
- Cut the rolled and filled dough into 20 pieces and bake in a preheated oven [200 C] for around 13 minutes, depending on your oven. Before you bake the biscuits, it is a good idea to use a fork to prick the biscuits like the way one would make shortbread biscuits.
- Remove the biscuits, allow them to cool on a cooling rack and then store them in an airtight tin.
Subscribe to:
Posts (Atom)


.jpg)


.jpg)